How To Fix Cyclic Redundancy Check Error On External Hard Drive?
How to Fix a Cyclic Redundancy Check (CRC) Error on an External Hard Drive
If your external drive shows a CRC error, don’t panic and definitely don’t start formatting it like a maniac. Start with the easy stuff, cable, port, another PC. Then try Windows Error Checking, then CHKDSK only if the drive stays stable. If the files matter, recovery comes before repair. And if the drive is clicking, disappearing, or getting absurdly slow, stop there and focus on getting the data out.
Last week, late at night, I plugged in an old external hard drive because I needed a folder from a client project I should’ve archived properly years ago. It was quiet outside, I was already tired, and Windows gave me a CRC error like it had been waiting for the worst possible moment. That sinking feeling is very real.
I’ve seen this enough times now that I don’t treat a CRC error as one single problem. It’s a symptom, not the diagnosis. Sometimes it’s just file system corruption. Sometimes it’s a bad USB cable doing cheap-cable things. And sometimes the drive is basically warning you that it’s done.
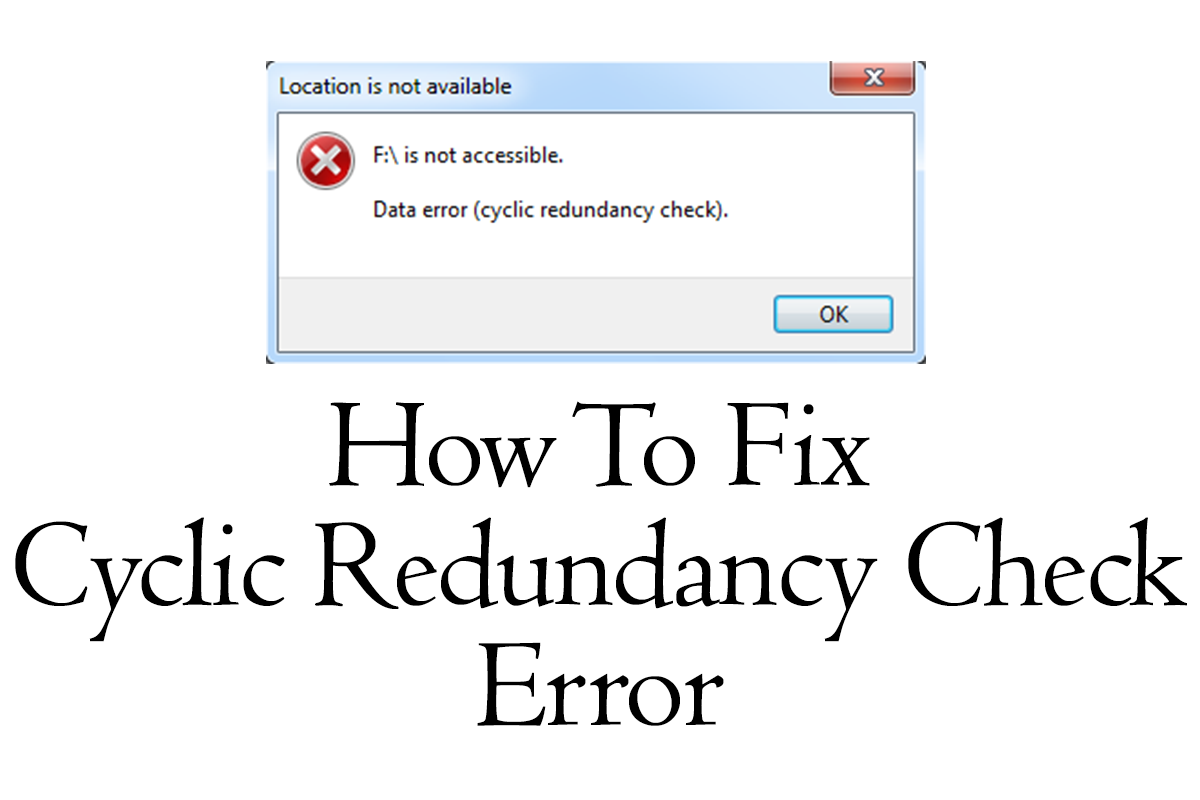
CRC stands for Cyclic Redundancy Check. In plain English, Windows reads data from the drive, checks whether that data still makes sense, and if it doesn’t, you get the error. So the issue is usually corruption, read failure, bad sectors, or hardware trouble somewhere in the chain.
If the data matters, stop writing anything to that drive right now. Don’t copy new files to it. Don’t run random cleanup tools. Don’t keep reconnecting it for two hours hoping it suddenly develops manners.
What a CRC error usually means
Most of the time, a CRC error on an external hard drive points to one of these:
- File system corruption, often after unsafe removal or a crash
- Bad sectors, where parts of the disk no longer read properly
- USB cable or port trouble, which is more common than people think
- Failing hardware, especially older mechanical drives
- Power or enclosure issues, common with cheaper external cases
And yes, sometimes the fix is annoyingly simple. I’ve had a drive throw ugly read errors, then behave normally the second I swapped the cable. So before you run anything heavy, try a different cable, a different USB port, and if possible, another computer.
What I’d do first, in order
| Step | What to do | Risk level | Why it matters |
|---|---|---|---|
| 1 | Try another USB cable, port, or PC | Low | Rules out connection problems fast |
| 2 | Run Windows Error Checking | Low | Can fix light file system issues |
| 3 | Run CHKDSK from Command Prompt | Medium | More thorough, but can stress a weak drive |
| 4 | Recover data before formatting | Medium | Safer if the drive is unstable |
| 5 | Quick format only if you’ve accepted the risk | High | Last resort, not the opening move |
Common mistake: people keep running repair tools again and again on a dying drive. If the drive clicks, disconnects, or becomes painfully slow, stop trying to “fix” it and start trying to save the files.
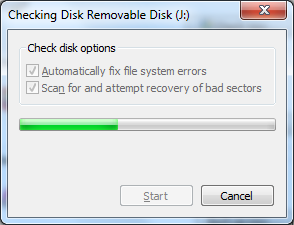
Method #1: Use Windows Error Checking
This is the first thing I try when the drive still appears normally in File Explorer and doesn’t sound sick. It’s built into Windows, it’s low-risk, and sometimes it fixes the problem without drama.
The menus can look a little different depending on whether you’re on Windows 10 or Windows 11, but the path is basically the same.
| Method | Works best when | Risk | Time needed |
|---|---|---|---|
| Windows Error Checking | The drive shows up and stays connected | Low | Usually a few minutes to longer on bigger drives |
Best for: drives that still appear in Windows and aren’t making weird noises.
Skip if: the drive keeps disconnecting, clicking, or doesn’t show up reliably.
How to run Error Checking
- Connect the external hard drive to your PC.
- Open File Explorer.
- Right-click the affected drive and click Properties.
- Open the Tools tab.
- Under Error checking, click Check.
- If Windows says the drive doesn’t need scanning, you can still choose to scan it.
- Let it finish, then restart your PC if Windows asks.
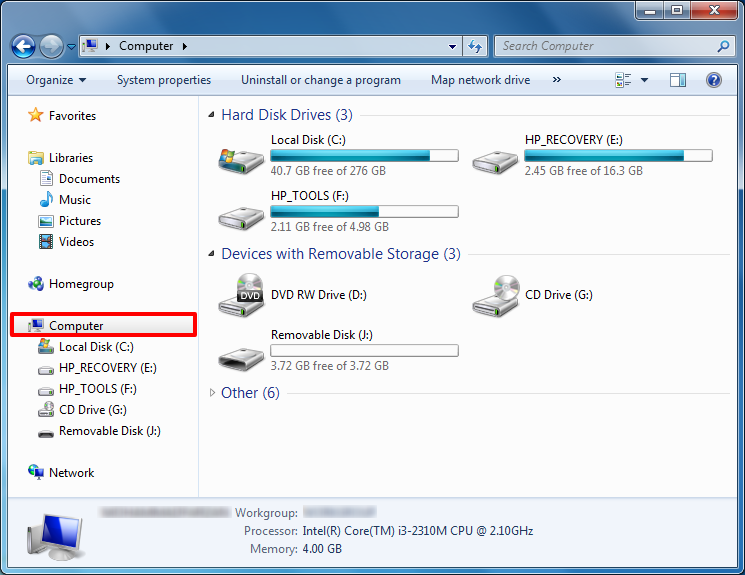
First, make sure Windows can still see the drive and assign it a proper drive letter.

If it appears here and stays connected, Error Checking is a sensible first try.
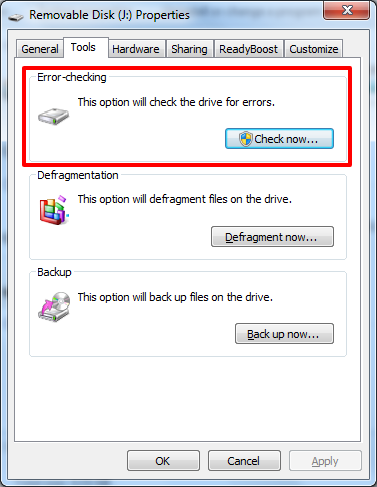
The wording may change a bit across Windows versions, but the tool still lives in the drive’s Tools tab.
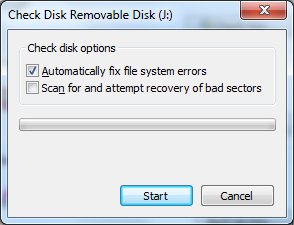
Older screenshots may look dated now, but the core idea hasn’t changed.
If the scan starts and the drive stays connected, that’s a decent sign.
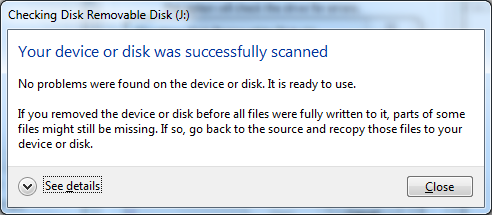
Once the scan finishes, try opening the drive and copy out the important stuff immediately.
If this works and the drive opens again, nice. But don’t trust it too much. Get your files off right away. A drive that throws one CRC error can absolutely do it again next Tuesday just to annoy you.
Method #2: Run CHKDSK from Command Prompt
I used to recommend CHKDSK almost on autopilot. I don’t anymore. It still helps, sometimes a lot, but on a physically weak drive it can push the disk for hours, and that isn’t always a great trade if the files are important.
So here’s my rule now. If the drive stays connected and seems stable enough, CHKDSK is worth a shot. If it clicks, disappears, or hangs every few minutes, skip to recovery.
| Method | Works best when | Risk | Time needed |
|---|---|---|---|
| CHKDSK | The drive is readable but corrupted | Medium | Minutes to many hours |
Best for: readable drives with corruption after unsafe ejection, power loss, or interrupted transfers.
Skip if: the drive shows obvious hardware failure signs.
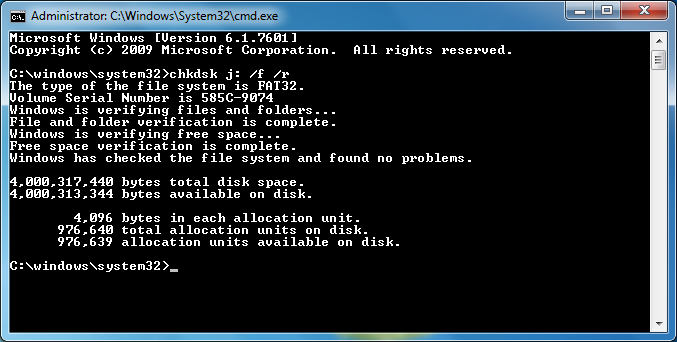
How to run CHKDSK
- Click Start and search for cmd.
- Right-click Command Prompt and choose Run as administrator.
- Type this command, replacing X: with your actual drive letter:
chkdsk X: /f /r
Example:
chkdsk J: /f /r
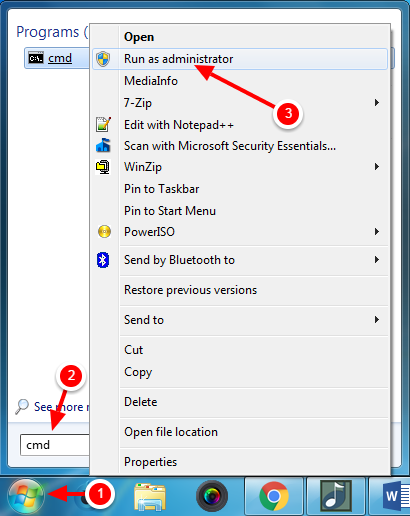
Run Command Prompt as admin, otherwise CHKDSK may not do what you need.
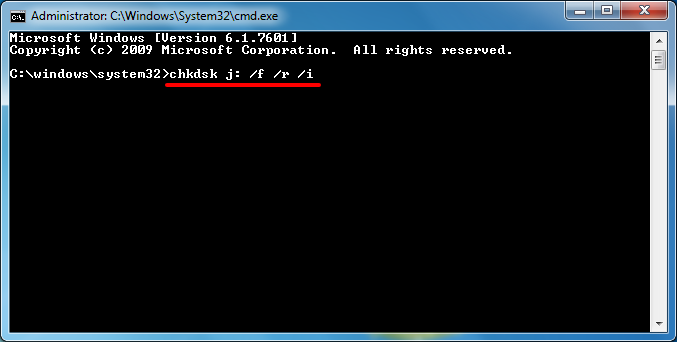
Double-check the drive letter. Getting that wrong is a silly way to waste time.
Those switches mean:
- /f fixes file system errors
- /r looks for bad sectors and tries to recover readable data
You may see older guides mention /i. For most people, you don’t need it here. chkdsk X: /f /r is the standard place to start.
Then wait. Seriously. On a healthy small drive it may finish fairly quickly. On a damaged 2TB or 4TB external disk, it can take ages and look frozen while it’s actually grinding through bad spots. I’ve stared at CHKDSK at 2:13 a.m. wondering if it died. It hadn’t. It was just having a miserable time.
When it finishes, look for repaired file system errors, bad sectors, and whether the drive is readable again.
Hidden cost: CHKDSK can put real stress on a weak drive. If the files are irreplaceable, recovery-first is usually the safer move.
Method #3: Recover the data, then decide if the drive is worth saving
This is where I part ways with a lot of old advice. Formatting before recovery is risky. Yes, a quick format followed by recovery software can still work in some cases. But if the drive is already unstable, why add another step that can make things worse?
My practical advice now is simple. If recovery software can still scan the drive, try that before formatting. Only consider a quick format if you’ve already failed with safer options, or you’ve accepted that the drive might be half-gone anyway.
Recovery tools worth trying
| Tool | Free option | Good at | Watch out for |
|---|---|---|---|
| Recuva | Yes | Simple recovery and beginner-friendly scans | Not great for badly damaged partitions |
| PhotoRec | Yes | Deep raw file recovery from damaged media | Messy results, filenames and folders often lost |
| TestDisk | Yes | Partition repair and serious recovery work | Not beginner-friendly at all |
| Disk Drill | Limited | Cleaner interface and easier scanning | Free recovery limits vary by platform and version |
Recuva is still fine as an easy starting point. PhotoRec and TestDisk are more nerdy, a bit ugly too, but they can rescue files when prettier tools tap out. Disk Drill is easier on the eyes, though the free tier limits can change, so check current terms before you rely on it.
Best for: drives that still stay connected long enough to scan.
Skip if: the drive is clicking, vanishing from Disk Management, or getting worse every hour.
Using Recuva to recover files
Recuva is still active as of 2026, though installer flow, offers, and plan details can change. Download it from the official Piriform source, not some random software site with ten fake buttons. That’s how you turn one problem into three.
Pricing note: free and paid options can change over time, so check current details before installing.
Basic flow:
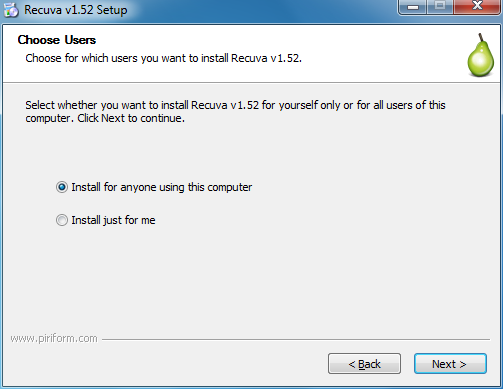
- Install Recuva on your PC, never on the damaged external drive.
- Open the recovery wizard.
- Select the file types you want, or choose All Files.
- Choose the affected external hard drive as the scan location.
- Run a normal scan first.
- If that finds almost nothing, run a deep scan.
- Recover files to a different drive.
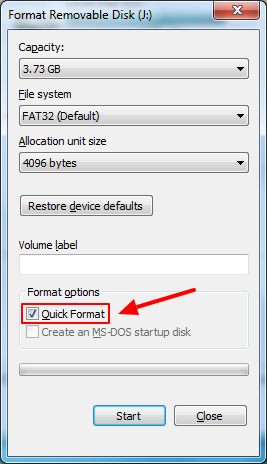
If you’re looking at the format screen, slow down. This should not be your first step.

That warning deserves respect, especially if the drive already has CRC problems.
Get recovery software from the official source and install it on a healthy internal disk.

The installer may look different now, but the overall setup is still simple.
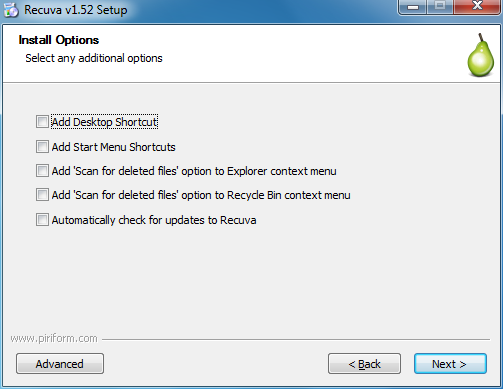
Read the install screens. Skip anything extra you didn’t ask for.
This part isn’t critical. The important bit is keeping the damaged drive untouched.

Default install path is fine, as long as it isn’t the failing external drive.
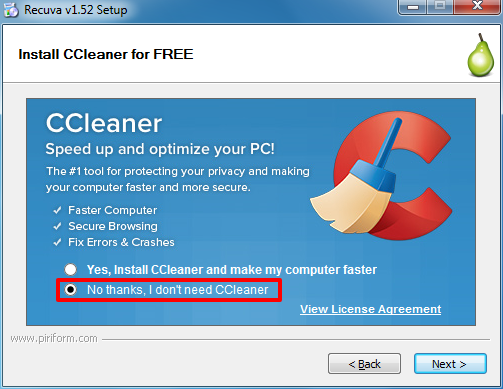
Be picky here. Extra bundled stuff is rarely useful.
Once installed, launch the wizard and keep writes away from the damaged disk.
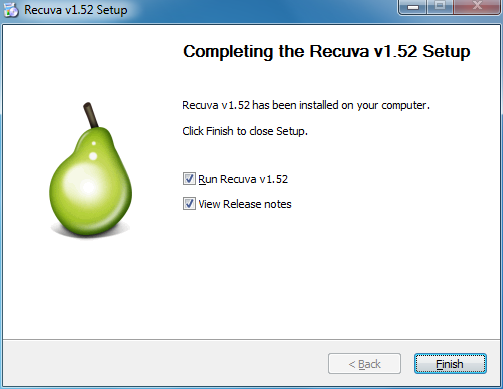
Now you’re in recovery mode, which is where you should’ve been before thinking about formatting.

The wizard is still one of the easier entry points for beginners.
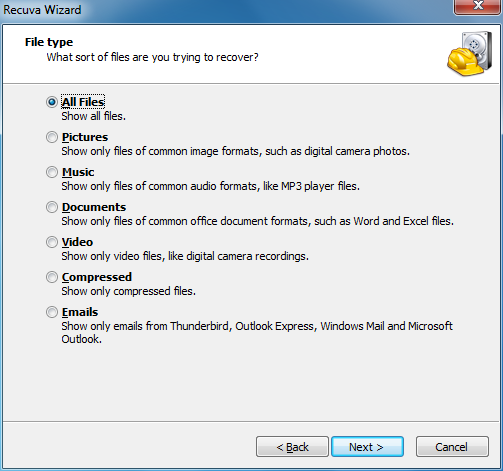
If the drive has mixed files, choosing All Files is usually the least annoying route.
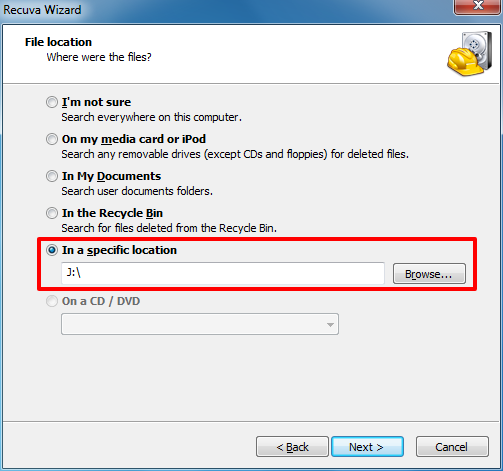
Pick the correct drive letter carefully. Small mistake, big waste of time.
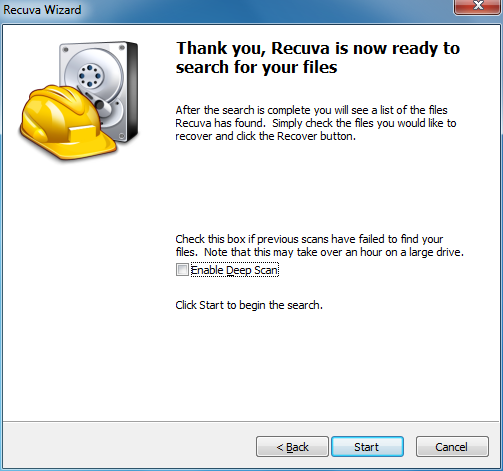
I still start without Deep Scan, then use it only if the first pass comes up weak.
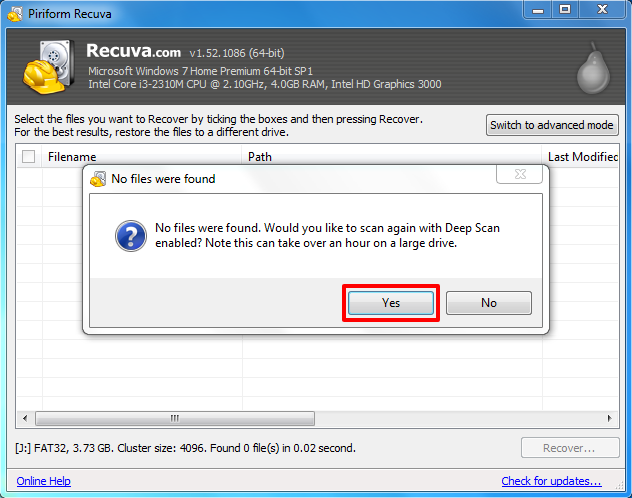
If the quick scan finds little, deep scan is the obvious next move.
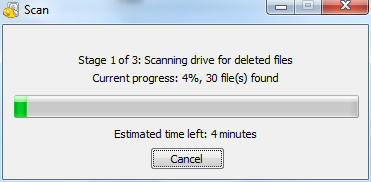
Deep scans take time. Make tea. Leave it alone.
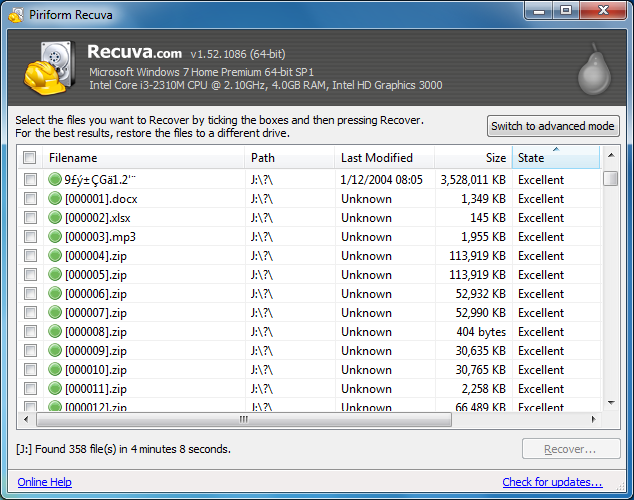
This is where you get the first honest read on how much of your data is still there.

Prioritize files in excellent or good condition first, especially documents, photos, and active project folders.
Those status labels usually mean:
- Excellent: high chance of a clean recovery
- Poor: may recover, may be damaged
- Unrecoverable: don’t plan your week around it
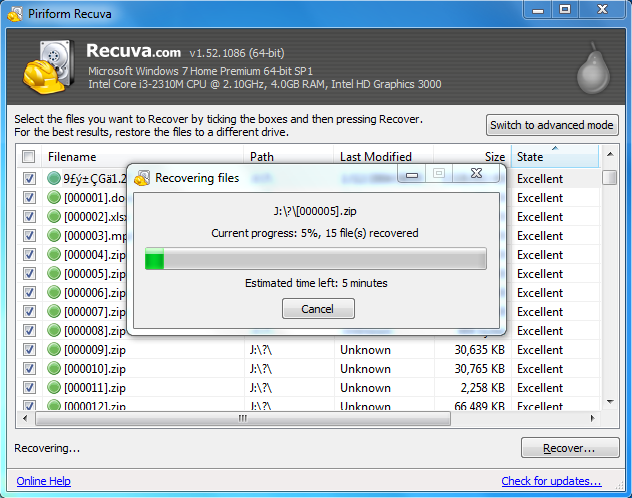
Always recover to another disk. Writing back to the same failing drive is asking for trouble.
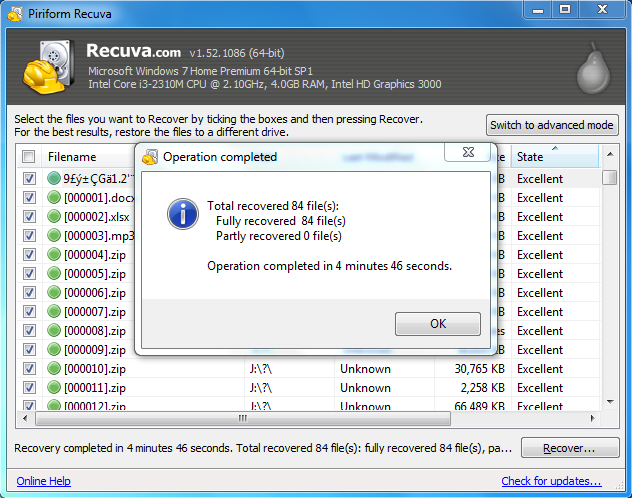
Once the files are safe, then you can decide whether the old drive deserves retirement.
Should you quick format the drive?
Only after you’ve recovered the data, or accepted that some of it may already be gone.
The old quick-format-then-recover trick can still work in some cases. I won’t pretend it never does. But for most people, and especially on a shaky drive, it should be the last thing you try, not the first clever trick from a forum thread in 2014.
If you do quick format, do it carefully:
- Use Quick Format, not full format
- Do not copy new files to the drive afterward
- Run recovery software immediately
- Save recovered files to another disk
Who this is for: someone with a readable but corrupted drive and no safer recovery path left.
Who this isn’t for: someone hearing clicks, beeps, failed spin-ups, or constant disconnects. That’s hardware trouble, not a software cleanup job.
Signs the drive is physically failing
This part matters because software can’t fix metal, motors, or dying heads. If the drive is physically failing, repair tools can make the situation worse.
- The drive clicks, beeps, or grinds
- It disconnects and reconnects by itself
- Transfers start, then freeze completely
- Windows detects it only sometimes
- SMART warnings appear in disk tools
- The enclosure gets unusually hot
If you’re seeing these signs, stop messing with CHKDSK and similar tools. If the files matter a lot, professional recovery is the safer move. Expensive, yes. Painful also yes. But if it’s your business records, family photos, or legal documents, it can still be the right call.
What I’d actually do
If it were my drive, my files, and my bad mood on a humid evening, I’d do this:
- Swap the cable and USB port first.
- Try the drive on another PC if possible.
- Run Windows Error Checking.
- If the drive stays stable, run CHKDSK.
- If the files matter and the drive feels sketchy, recover data before even thinking about format.
- Retire the drive after recovery if it showed bad sectors or repeated CRC issues.
Honestly, once a drive gives me a serious CRC episode, I stop trusting it. Maybe it works for another six months. Maybe it dies next Friday when you’re already late and the room is too warm and you’re regretting every backup habit you’ve ever had. I’ve been there.
Final recommendation
If you want the short answer, here it is. Start with the cable and port, then use Error Checking, then CHKDSK only if the drive is stable, then move to recovery software before formatting.
If the drive is clicking, disappearing, or crawling like it’s in pain, skip the hero stuff. Recover what you can, or go to a professional if the files are truly irreplaceable.
If it was my money, I’d only keep using the drive after a CRC error if I was very sure the problem was the cable or enclosure. Otherwise, I wouldn’t risk it. Replace the drive and move on.
That’s the boring answer. It’s still the one that saves the most data.