VR and AR are changing the way how we interact with digital screens. 360 Photos & videos are getting more and more serious every day, especially after support from world biggest media players like Facebook and YouTube.
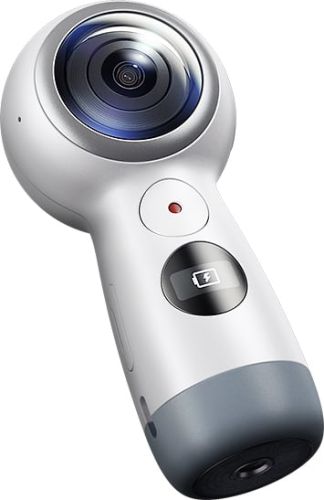
Though we haven’t seen any built-in 360 cameras on any smartphone yet but sooner or later we gonna get it. For now, there are many mid to high range 360Degree Cameras available. The most popular choice for consumers is Samsung Gear 360. It’s not as perfect as it has to be, but still, its easy use, low price, and good functionality make it unparallel to any available device. As a fan of Digital Photography, I thought to give 360 cameras a try, so I purchased 360 Gear VR 2017 version. It was pretty nice. I used it recently to capture my trip moments and they look great.

When I tried to share 360 Photos on Facebook with my friends, they weren’t rendering properly in 360 formats. I was getting like two circles of images from both lenses. Earlier, I have uploaded photos directly from my Samsung S8 phone and they rendered properly but this time I was uploading from my PC and images weren’t rendering properly so I started searching for a solution. I came to know that I have to stitch images together before uploading. So I downloaded 360 Director app from Samsung site and stitched images.
Now images were looking like a big panorama on Mac image viewer, not circles like before. I again tried to upload these photos on Facebook but the same happens with me, they didn’t get rendered properly but this time they were looking panoramas, not circles.
I was clueless what could be the problem, then I started studying about 360 content in FB documentation and came to know that pictures must have valid 360 meta tag which will help FB identify them as 360 and rendered them properly.
They mentioned several methods for adding that metadata like custom meta editing and whatever but the simplest method I got is using small program with Terminal/Command prompt.
Its quite easy to use this method but if you haven’t used command line earlier then there is a small learning curve. Don’t worry it’s not so difficult. You have to just locate the file on the command line and then execute a command on it. Here’s how:
- Get your photos from 360 Camera and stitch them together using whatever program you are using.
- Place them in any close folder or on the desktop, where they can be easily accessible.
- Download Exif Tool from this site for your Mac or PC & Install it simply.
- Open Command Prompt on PC from start menu OR Terminal on MAC from spotlight search.
- Now you have to locate the folder on the command line where your stitched 360-degree photos are stored. This sounds little technical but its easy. Type ls on the command line. (The means show me all the files in the folder I am standing). You will see a lot of folders here. Now you have to move to the folder where your files are located.
- Suppose your files are on the desktop and you see the DESKTOP folder in the list above, then simply type cd desktop and hit enter (then ls again and move to your folder), If you don’t see an error or get to new-line with folder name in line start, then you did it right. Remember its case sensitive on most devices which means you have to type exactly the folder name as it is including small and big characters.
- When you get into the folder where your files are located. Use this command
exiftool -ProjectionType=”equirectangular” photo.jpg
Change Photo.jpg with your image name and hit enter. If you see no error or success message, then you did it right. Congrats.
TIP: Window users can get directly into that folder by opening command prompt directly in that folder from the left menu.
Now you can upload your 360-degree image on Facebook or any other place and it will be rendered correctly.
Below is the preview of 360 degree I published.
Got Stuck on any problem? Need help? Ask me I can help you for free.


