We all have reached this stage on the Internet where every other user require an access to cloud storage in order to create a backup of their important media or files, just in case our personal PC, laptop, or any other backup storage gets corrupted or damaged.
There are large numbers of free third party cloud storage choices available for us to choose from but almost all of them have the main downside i.e. limitation of storage.
Moreover, all of them are third party cloud service providers and some of us cannot really trust them with our personal and sensitive data.
Privacy!
Yes, that’s the main reason why many of the curious Internet users are looking for a better alternative, which is secured, cheaper, and cost effective. So this is how the making of your own personal cloud server came into existence.
While searching the Internet, I found a number of personal cloud server service providers that enables you to transform your home PC into your very own personal cloud server. And I even tried to set them up on my PC but they require a lot of time, efforts, and few major modifications to your operating system files too.
Apart from those issues, the number one problem I faced after properly getting those configured is the limited resources. Once I got them setup on my PC and started using them to synchronize my files, suddenly I found out that my computer started to feel sluggish and non-responsive.
Then after further research, I came across another remote access software named Tonido, which is not much famous.
If I compare it with other similar software like OwnCloud then I can certainly say that none of them worked like Tonido.
Tonido is a lightweight software, does not require much computer resources, and is easy to setup on any PC.
What Is Tonido And How It Works?
In a nutshell, Tonido is a remote access software that is designed for those devices who storage are attached to network.
To make this work, all you really have to do is download and install the server application on your PC, create your own Tonido account, get your own personalized URL, and then Tonido will magically make your computer’s files easily accessible remotely via Internet either through the web browser or the intuitive mobile apps.

Installing the Tonido server software on your computer will allow access to all the media files stored on that PC including music, videos, photos, to any other device connected to the Internet and have the login and password details of the Tonido cloud server.
All of that, at zero charges. Yes, you heard that right! Tonido is free of cost and does not charge you a single penny for their services.
Features of Tonido
Before we begin with the instructions and step by step guide about setting up your own personal cloud server on PC using Tonido, first I would like to provide some knowledge about the key features of Tonido.
- Tonido provides unlimited remote access to the files and media as well as no limitations on the sharing of those files;
- Suitable for professionals and small businesses looking for a simple and easy to setup personal file sharing solution;
- Ability to stream your entire media library including music, videos, and photos without any necessity to upload them to any online cloud service;
- Keep all of your important medias, files, and documents in sync between multiple PCs;
- Ability to instantly share huge files without any prerequisite of uploading them to the cloud service first;
- Universal software and mobile app that works on almost any operating system or device including Windows, Mac, Linux, Android, iOS, BlackBerry, Windows Phone, and without any limitation.
How To Make Personal Cloud Server On PC Using Tonido?
Okay, now here I have created a thorough and in-depth step-by-step guide about making your very own personal cloud server on PC using Tonido.
In order to make this comprehensive and detailed guide easier for you to follow, I have divided it into multiple sections. Names of all the sections along with their number are outlined below.
- Section #01 – Downloading Tonido Personal Cloud Server On Windows PC
- Section #02 – Installation of Tonido Personal Cloud Server On Windows PC
- Section #03 – Creation of Tonido Account On Windows PC
- Section #04 – Configuring Tonido Personal Cloud Server On Windows PC
- Section #05 – Setting Up Tonido On Your Android Mobile
Section #01 – Downloading Tonido Personal Cloud Server On Windows PC
In this section, I will guide you about how to download Tonido cloud server setup on your Windows PC.
Step #01 – Go to the official website of Tonido by accessing the URL: www.tonido.com
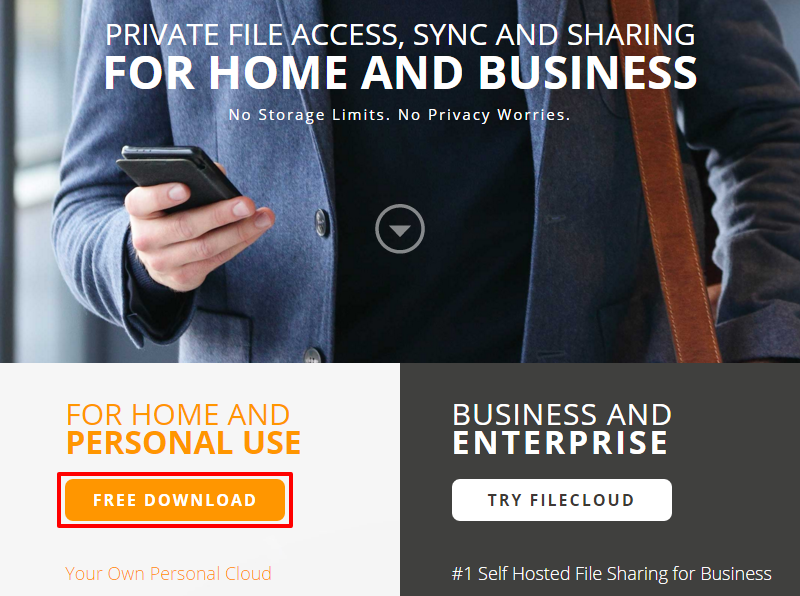
Step #02 – Since we are doing this setup for home and personal usage, so we will select a “Free Download” option located at the right side on the website (As I have highlighted in the screenshot).
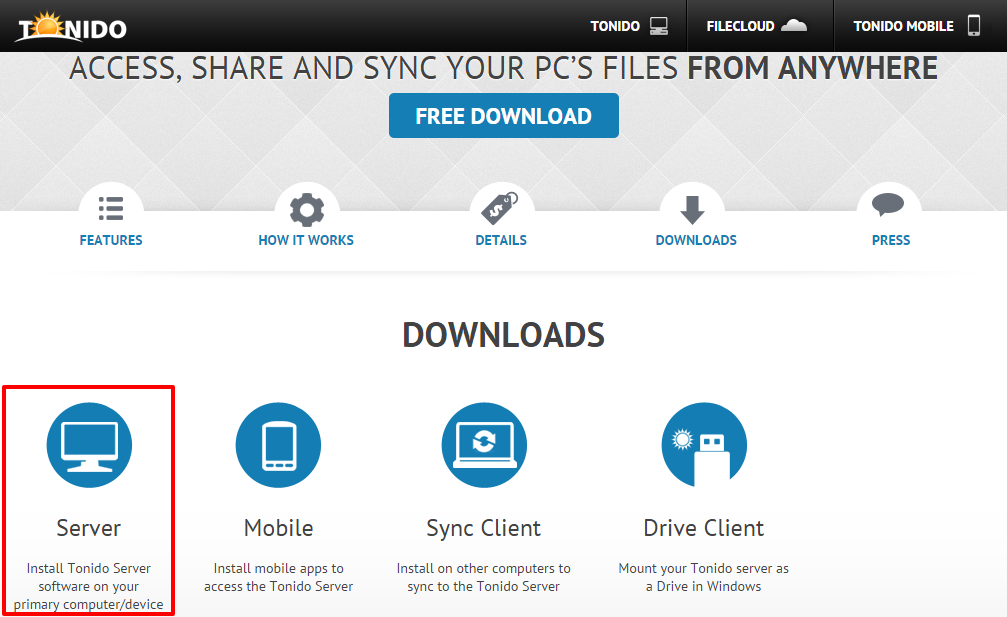
Step #03 – You will now get redirect to the “Downloads” section, this is where you can select the device you want to install the Tonido server on.
Here, we will select the “Server” option as we are preparing to setup our PC as a primary Tonido server computer.
Step #04 – Under the Tonido Server section, you will have to select the “Free Download” option located right below the “Tonido for Windows” (as shown in the screenshot).
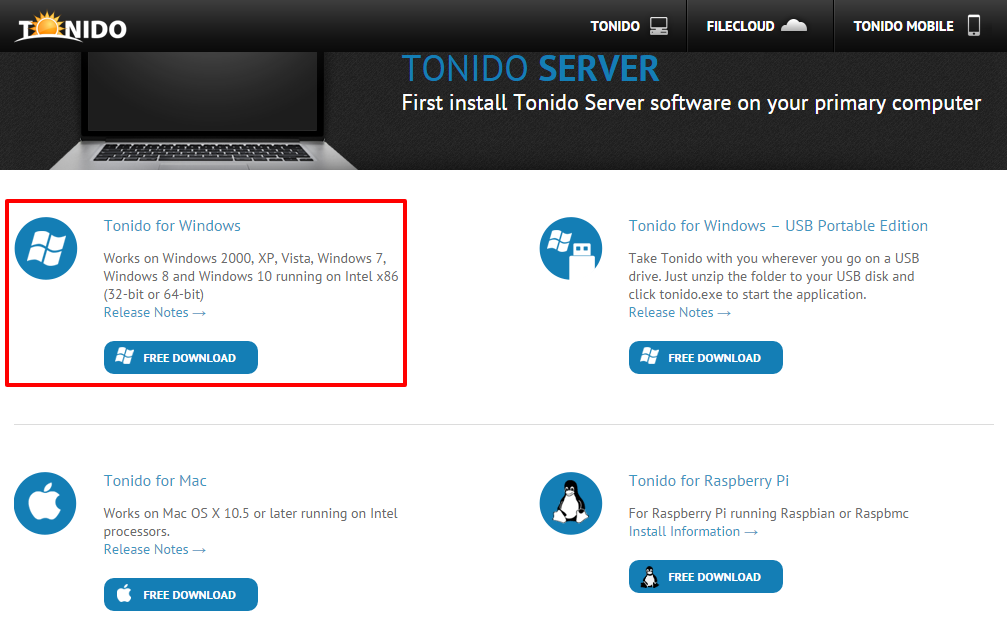
Step #05 – Your Tonido setup file should start downloading now and the website will show you the following screen.

Step #06 – Once the setup file has been downloaded successfully, please head over to the next section i.e. Section #02.
Section #02 – Installation Of Tonido Personal Cloud Server On Windows PC
In this section, I will guide you about how to properly install Tonido personal cloud server on your Windows PC.
Step #01 – To begin the installation process; double click on the setup file that you downloaded in the previous section.
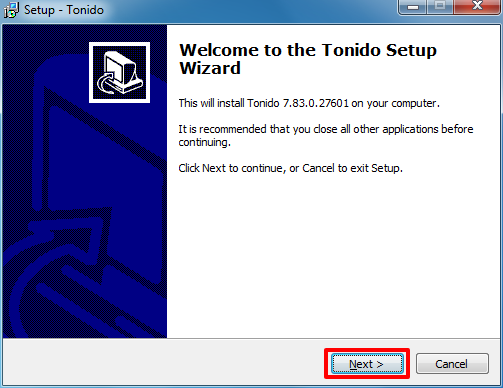
Step #02 – Tonido setup wizard should popup on your screen now. Click on the “Next” button to continue the installation.
Step #03 – Wizard will now ask you to name a folder on the Start Menu, where you want the setup to place the shortcut files of Tonido.
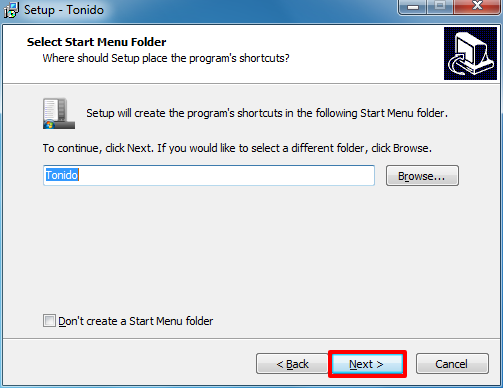
The folder name should be filled in already for you, but in case you want to change it to something else or don’t want the wizard to create a Start Menu folder then this is your chance to modify it.
Else, if you are okay with it, simply click on the “Next” button.
Step #04 – Wizard will now ask you to select additional tasks that you want it to perform during the installation process. Those tasks are:
- Create a desktop icon;
- Create a Quick launch icon;
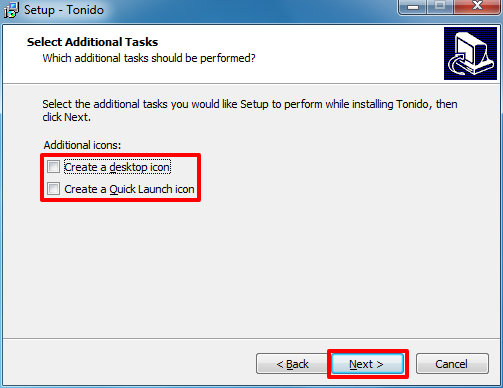
If you want wizard to create any of those icons for you, then put a mark on the checkbox located right beside them.
FYI, I would personally like to have a shortcut icon on my desktop. ?
Once done, click on the “Next” button to continue.
Step #05 – Now, before starting the installation of Tonido on your computer, wizard will now show you a review of your selections you did in previous steps.
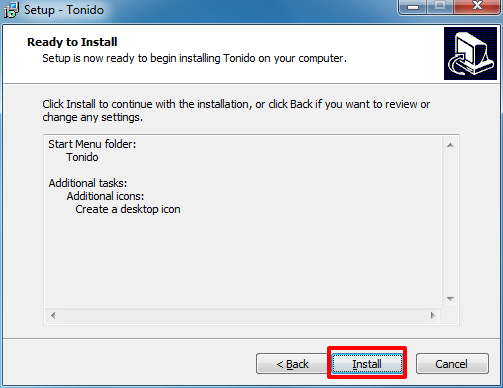
Once you are satisfied with all the settings shown in the box then click on the “Install” button to begin the installation of Tonido on your computer.
Step #06 – Installation procedure should take no longer than five (05) minutes to complete. (In my case, the installation was completed successfully within a minute. ? )
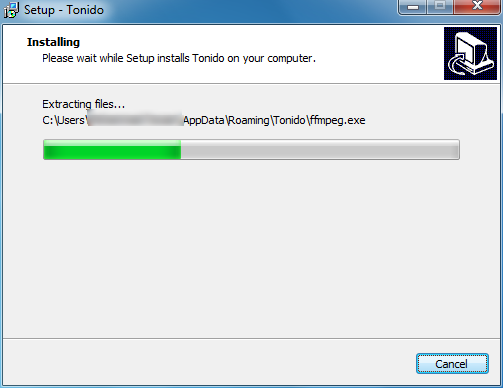
Step #07 – The wizard should now show you the following screen.
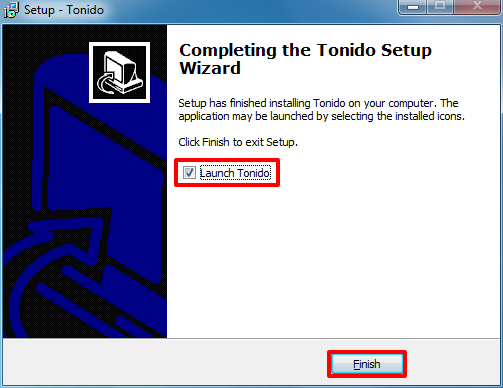
Now, if you want the wizard to automatically launch Tonido once you click on the “Finish” button then put a check mark on the given checkbox. Otherwise, if you planned to launch it later then remove the check mark.
Click on the “Finish” button once you have made your selection.
Step #08 – Now head over to the next section i.e. Section #03 where I will guide you about the creation of Tonido account.
Section #03 – Creation of Tonido Account On Windows PC
In this section, I am going to guide you about how to create and verify your Tonido account using your Windows PC.
Step #01 – Double click on the Tonido icon created on your computer desktop to launch the program, if you haven’t already.
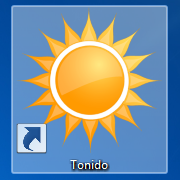
Step #02 – Now, as soon as you launch the program, Windows Security Alert would popup, asking for a confirmation if you want to allow Tonido to communicate using your computer network.
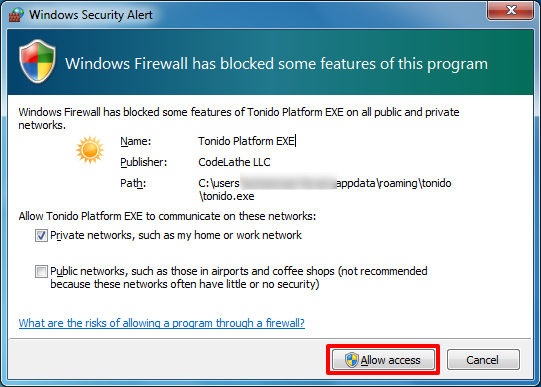
Verify your settings and click on the “Allow access” button to grant access to Tonido.
Step #03 – On the backend, Tonido should have launched your default web browser and opened the local address to begin the account creation process of Tonido on your PC. (The page should be similar to the one shown in the screenshot below).
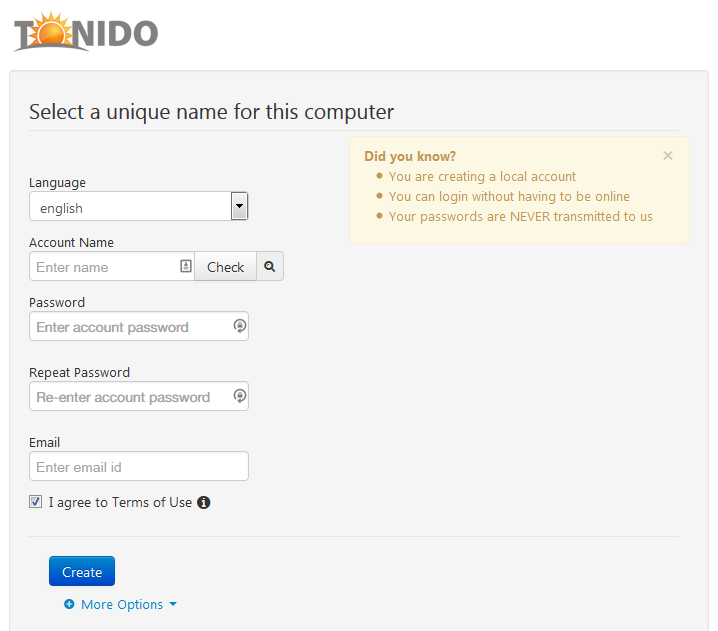
NOTE: This page should create a local account on your computer and these account details would be required to access this computer.
Step #04 – Select your preferred language from the drop down list. (I selected ‘English’).
Step #05 – Under the “Account Name” box, enter your name and make sure that the name you enter is unique and available by clicking on the “Check” button.
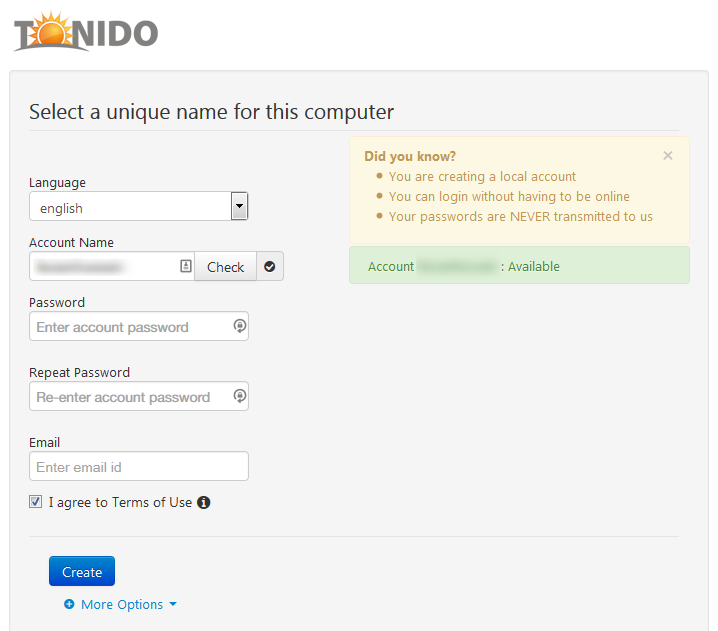
Tonido will check and verify if the entered name is available or not. The status should be visible on the left side as highlighted in the screenshot above.
NOTE: It is important to note here that this username will be used to remotely access your own personal cloud storage server.
Step #06 – Enter password for your Tonido account in the “Password” and “Repeat Password” boxes.
Step #07 – In the email box, enter your valid email address. Make sure that the email address you enter here is correct because it will be used to verify your account.
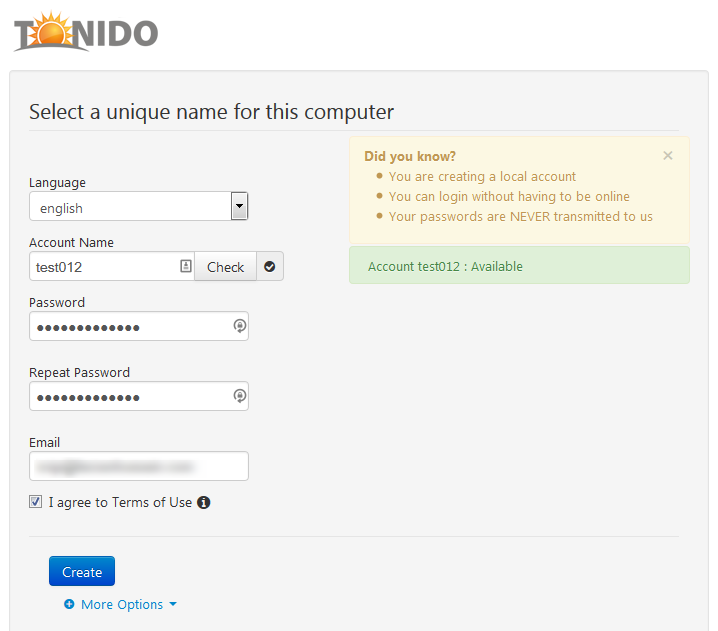
Step #08 – Once you have filled in all the boxes, click on the “Create” button to create your Tonido account.
Step #09 – Tonido will now create your account and automatically sign into your account to give you access to the control panel for further customizations.
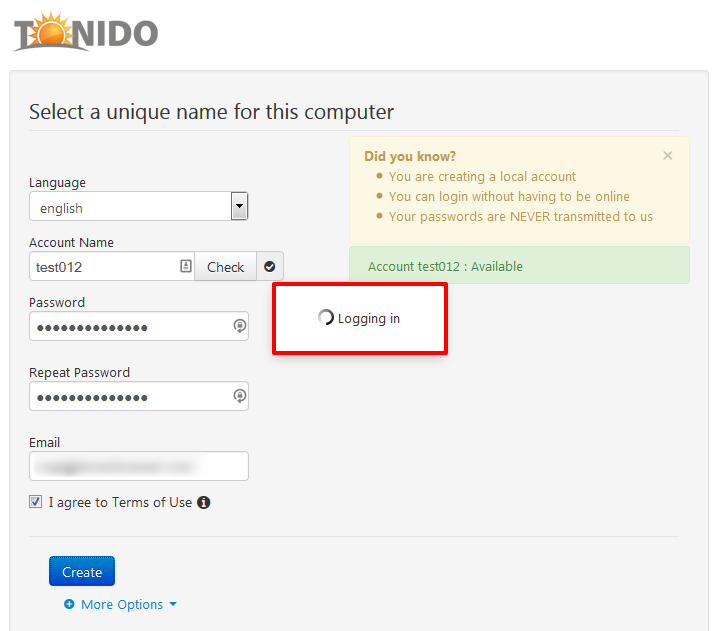
At this very moment, you must have received an email from Tonido about the creation of your account as well as a link to remotely access your cloud server.
Step #10 – Yay, congratulations! You have successfully created your Tonido account on your Windows PC. ?
Are you still with me? Great!
Now please jump over to the next section i.e. Section #04 for the remaining steps about the configurations of your Tonido personal cloud server.
Section #04 – Configuring Tonido Personal Cloud Server On Windows PC
In this second last section, I am going to guide you about how to properly setup and configure your Tonido personal cloud server on your Windows PC.
Step #01 – After your account creation and during your first access to the Tonido personal cloud server, you will see the following screen.
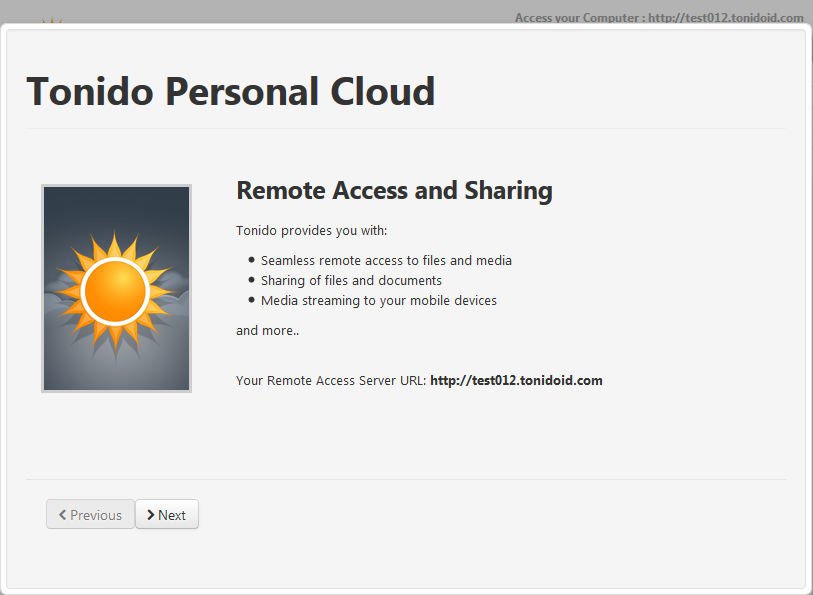
This is the page where you can see your personal “Remote Access Server URL” for the first time. (As highlighted in the screenshot above).
Click on the “Next” button to continue.
Step #02 – Tonido will now ask you for the folders that you want to allow for remote access and sharing via Tonido. The two available options are:
- Allow remote access to all folders – Select this option if you want to use your whole PC as a personal cloud server and want it to be accessible remotely.
- Allow remote access to only specified folders – Select this option if you want to use only selected folders as your personal cloud server and access only those selected folders remotely.
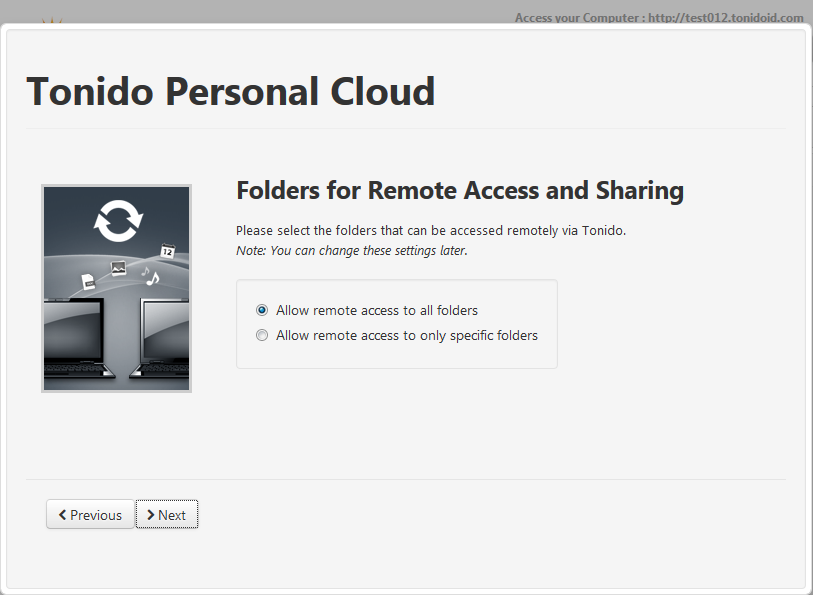
For my own personal cloud server setup, I decided to select the second option and selected only a single folder located in a C: drive.
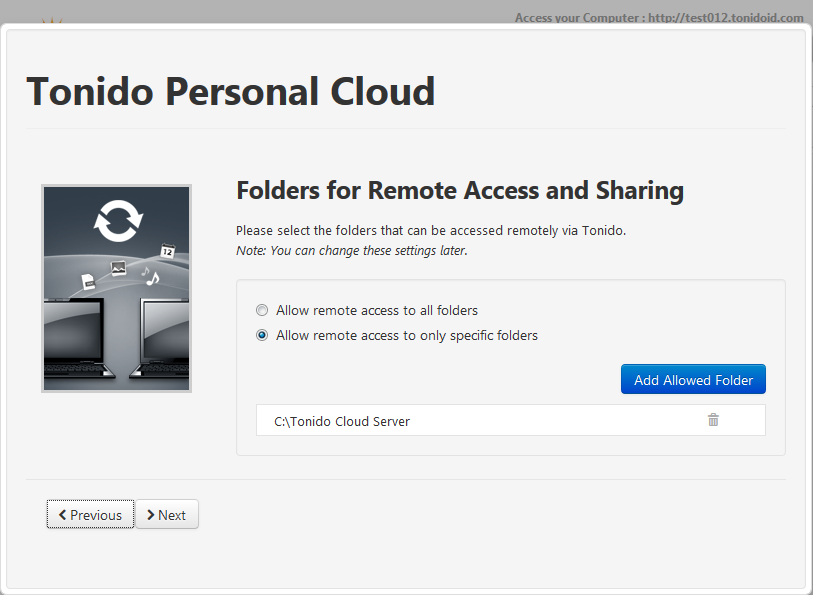
Once you have made your selection, click on the “Next” button to continue.
Step #03 – Tonido will now ask to select folders for indexation of media files, like music, videos, and photos, stored on your computer.
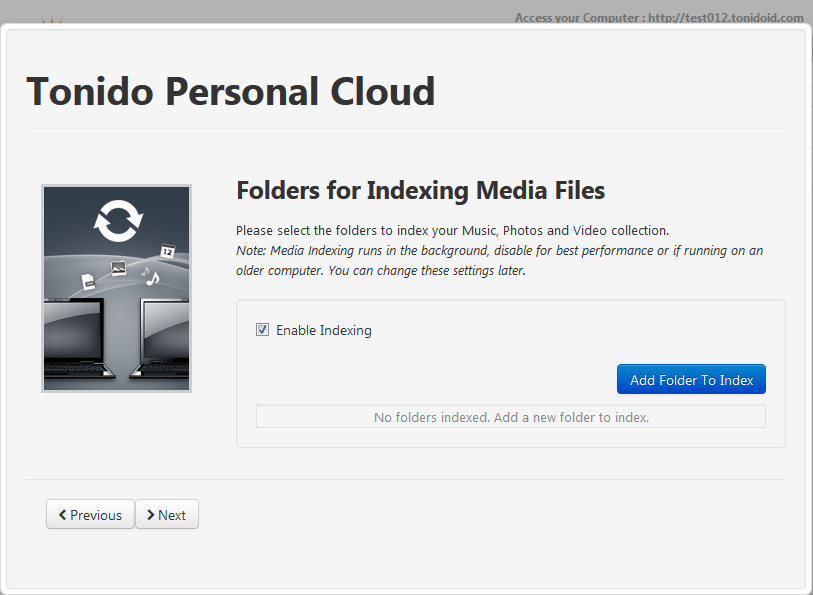
If you want Tonido to index any or all of these media files then you can put a mark on the checkbox located next to the “Enable Indexing” option and select the folders to index.
In case you are confused and cannot make up your mind at the moment then don’t worry and leave this option “Disabled” because you always change these settings later.
Click on the “Next” button to move on to the next step.
Step #04 – Finally, Tonido will show you a screen about the available mobile apps that you can download and install on your mobile phone to seamlessly access and sync all your files, photos, videos, and music.
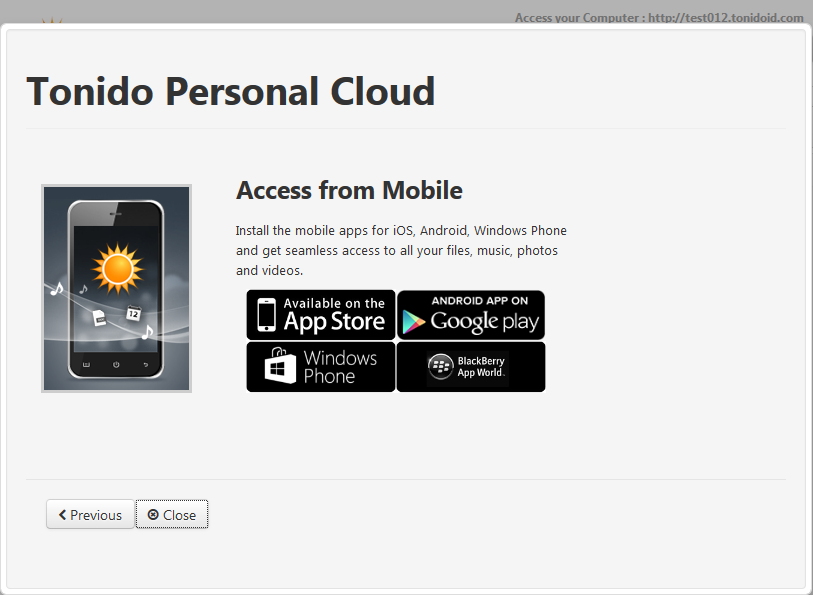
NOTE: If you are interested in setting up your mobile device then you can access Section #05, where we will guide you about how to setup Tonido on your mobile device to access your personal cloud server.
But for the time being, please click on the “Close” button so that we can configure personal cloud server on the computer.
Step #05 – Okay. Now you will see your personal cloud server control panel. This is where you can control all of your settings and configurations of your cloud server.
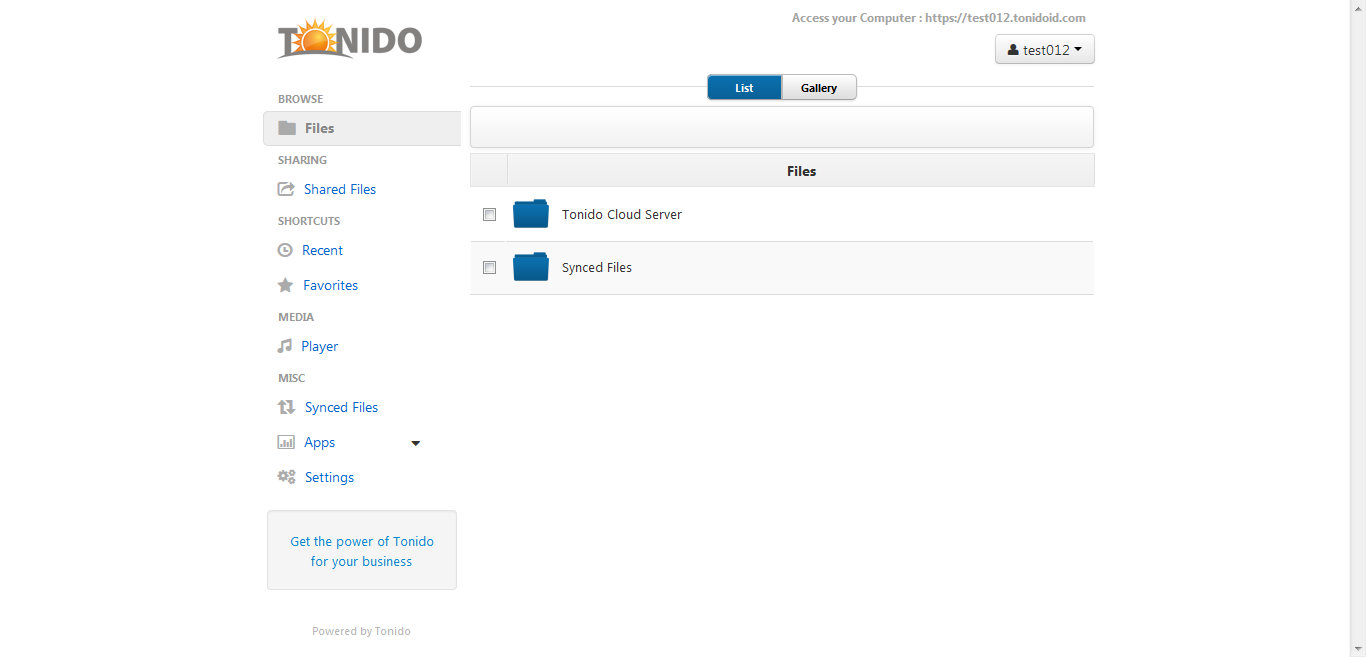
To access the settings and configuration section, simply click on the username located at the top right corner of the control panel.
Clicking on that button will open a drop-down menu (as you can see in the screenshot).
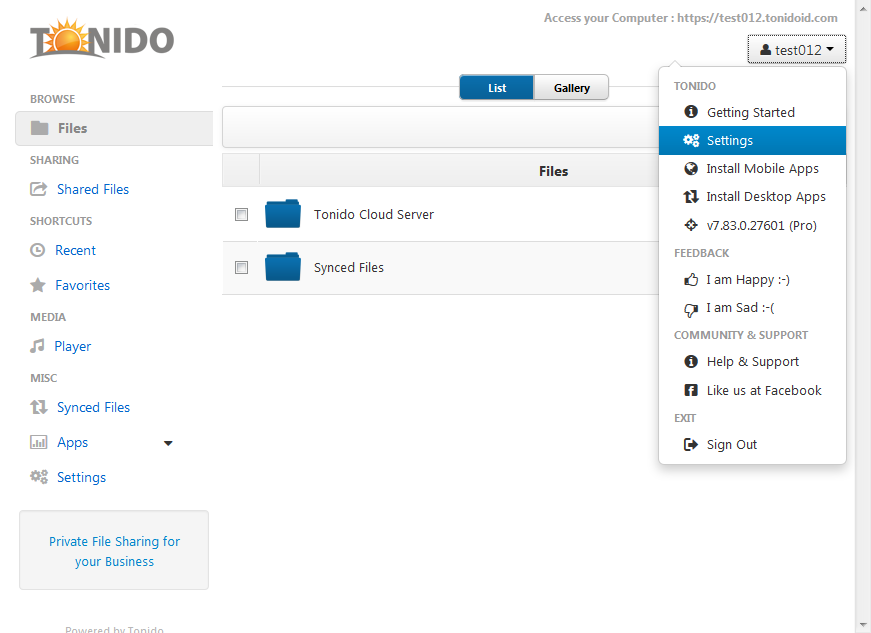
This is where you can select “Settings” option to access your account setup window.
Alternatively, you can also access the settings menu by selecting “Settings” option located at the left sidebar.
Step #06 – After clicking on the “Settings” option, you will see your account summary page where you can find all the status and information about your personal cloud server.
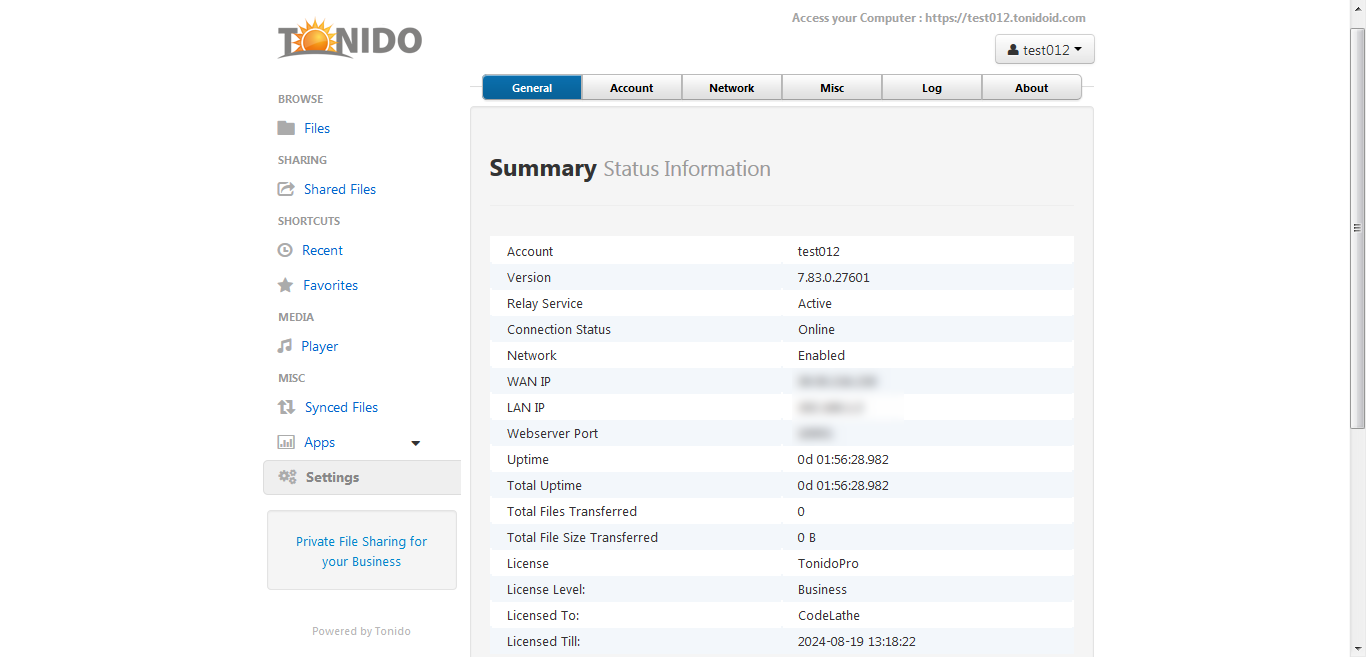
On the top, you will notice that there is a bar with six (06) categories or tabs i.e. General, Account, Network, Misc, Log, and About.
At the moment, you should be under the “General” tab.
Continue to the next steps to learn more about what you can do on the other settings tabs.
Step #07 – Under the “Account” tab, you will be able perform the following tasks:
- Change and modify personal information related to your Tonido account;
- Add additional layer of security to your personal cloud server by setting up remote login/answer for authentication;
- Change the location where all the user data would get stored;
- Change language;
- Last option will allow you to switch to a different account or create another account.
Step #08 – Under the “Network” tab, you will be able to change or modify following options:
- Configuration of the relay settings;
- Configuration of web and server settings where you can enable or disable remote web access, allowing remote access to admin panel, and to modify HTTP port number;
- Configure network settings.
Step #09 – Under the “Misc” tab, you will see the following options:
- Change or modify the folders you want to allow remote access to;
- Modify or specify the folders you want Tonido to index (like music, videos, photos);
- Enable or disable mobile device camera uploads. You can also select the folder on your computer where you want the camera-uploaded pictures to appear;
- Maintain your own ignore list where you can select the files and folders you don’t want Tonido to access;
- Enable or disable automatic importing of iTunes playlist.
- Jobs is a section where will be able to see and observe all the background jobs that are in progress like every indexing, uploading, and downloading task.
Step #10 – Under the “Log” tab, you will be able to see the recent account activity as well as able to download the log files for troubleshooting purposes.
Step #11 – In the end, “About” tab will show you all the information related to the Tonido software and the team working behind this software to make this all possible.
Step #12 – Well done! You are now aware about all the available functionalities and settings that you can modify anytime to further enhance your personal cloud server experienced.
Congratulations! You are now all set to test drive your very own cloud server completely setup on your local Windows PC. ?
Now, if you want to access your personal cloud server administration panel from any part of the world, simply go to your Remote Access Server URL, provide your password, and you will be browsing your personal cloud server in no time.
IMPORTANT: It is important to keep in mind that by going to the Remote Access Server URL, you will be accessing your local home PC. So it is obvious that your PC should need to be running all the time and must have to be connected to the high-speed Internet connection for a seamless synchronization.
Section #05 – Setting Up Tonido On Your Android Mobile
Are you interested in setting up your Android mobile device or tablet to access your personal cloud server?
If yes, then this section is for you! 🙂
Here in this section we will help you in setting up the Tonido mobile app on your personal mobile phone or tablet so that you can:
- Access and share media stored on your personal cloud server using the mobile device;
- Listen to your music collections on the go;
- Watch your videos remotely;
- Synchronize your device with your cloud server; and
- Remotely create a backup of all your files, photos, videos, and music on your home PC.
The Tonido mobile app is available for number of mobile operating systems including iOS (for iPhone and iPad), Android, Windows Phone, and BlackBerry (for Phone and PlayBook). You can check more details about the available mobile apps by heading over to the Tonido Mobile Apps menu located right under the Tonido download section.
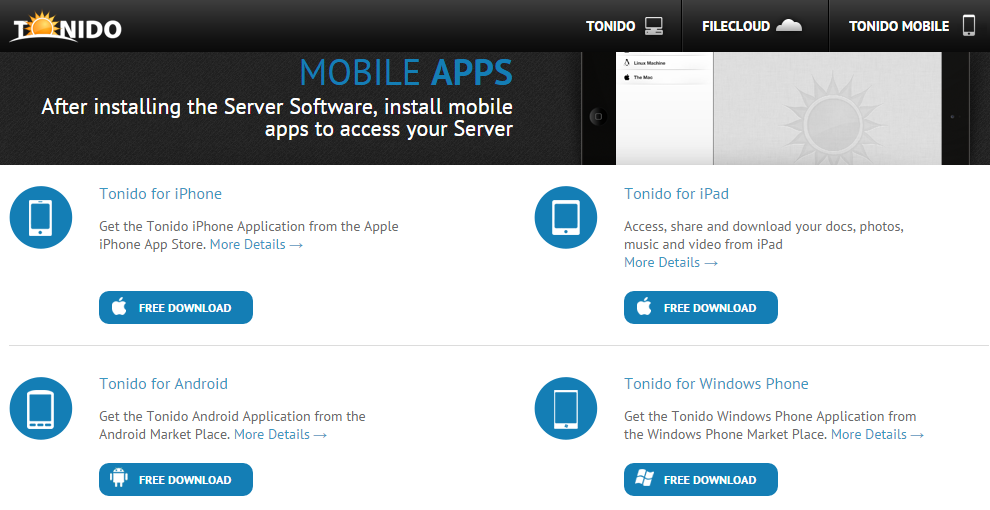
Anyways, the steps for setting up Tonido account on your Android mobile or tablet device in order to access your personal cloud server are as follows.
Step #01 – You can install “Tonido File Access Share Sync” on your Android phone or tablet in two ways:
- By accessing the Google Play Store app URL right from your computer system and then clicking on the “Install” button to remotely install the app on the selected device.
- Else, you can open Google Play Store on your mobile or tablet and then search for an app named, “Tonido File Access Share Sync”. And then tap on the “Install” button.
Once you have successfully installed the app on your Android device, head over to the next step.
Step #02 – Open the Tonido app by tapping on the newly installed app.
Step #03 – Tonido will greet you with a start-up screen, which must be similar to the one shown in the screenshot below.
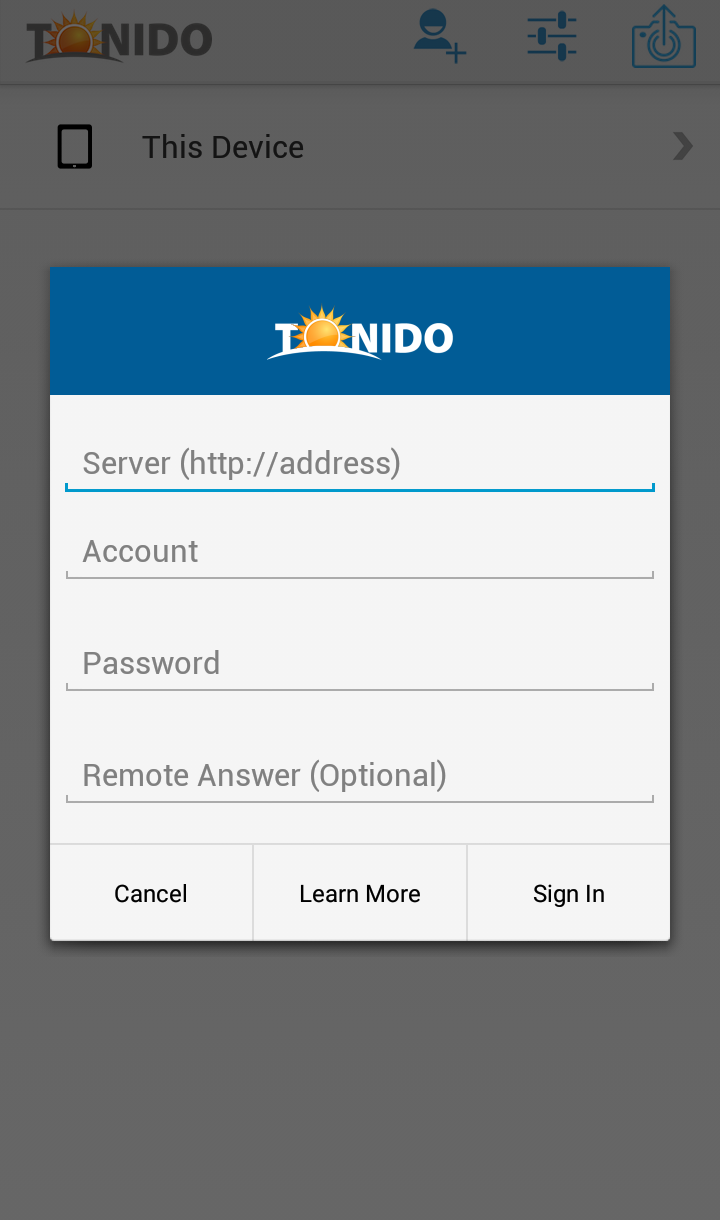
Step #04 – Here you have four boxes. I will guide you what you need to fill in these boxes for proper configuration.
- In the first Server URL box, type your Remote Access Server URL.
Example: http://.tonidoid.com - In the Account box, type your user-name.
Example: - In the Password box, type your Tonido password.
- In the Remote Answer box, type your remote answer (this is only required if you have set one in the control panel).
Once you are done, tap on the “Sign In” button.
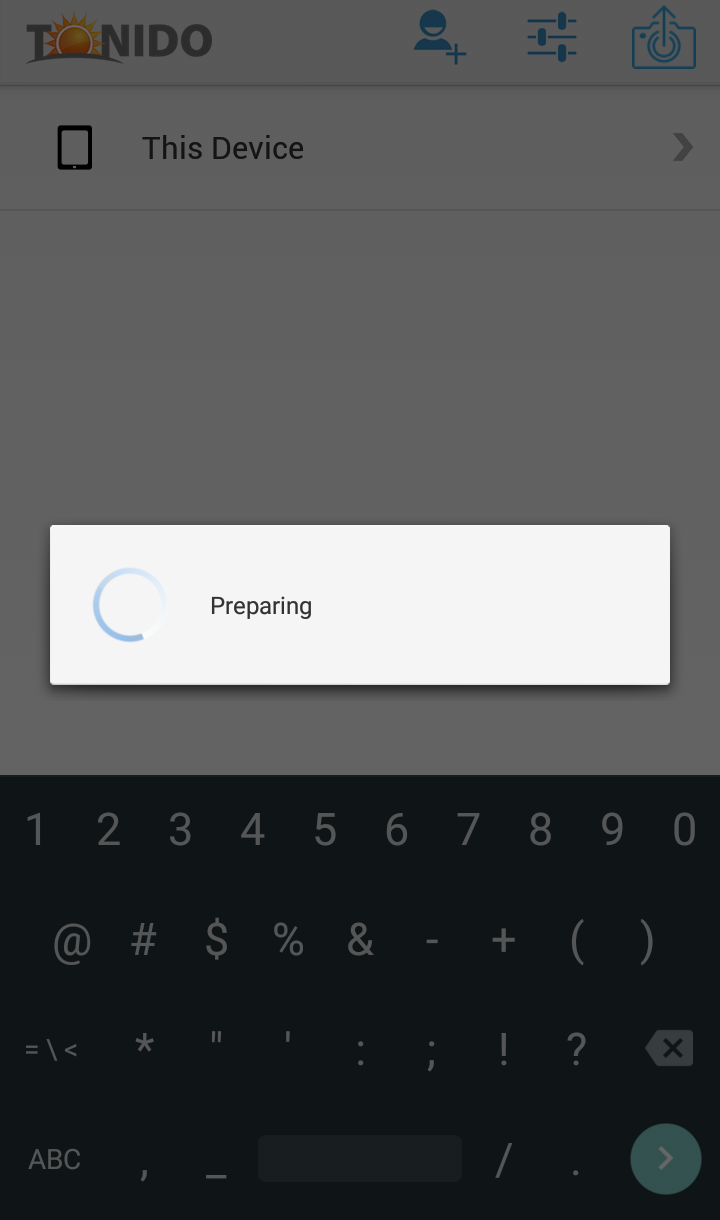
Step #05 – It will now show you a message that says, “Preparing”. This means that your mobile app is now communicating with your personal cloud server.
Step #06 – Once your account has communicated with your cloud server successfully, it will show you the following screen.
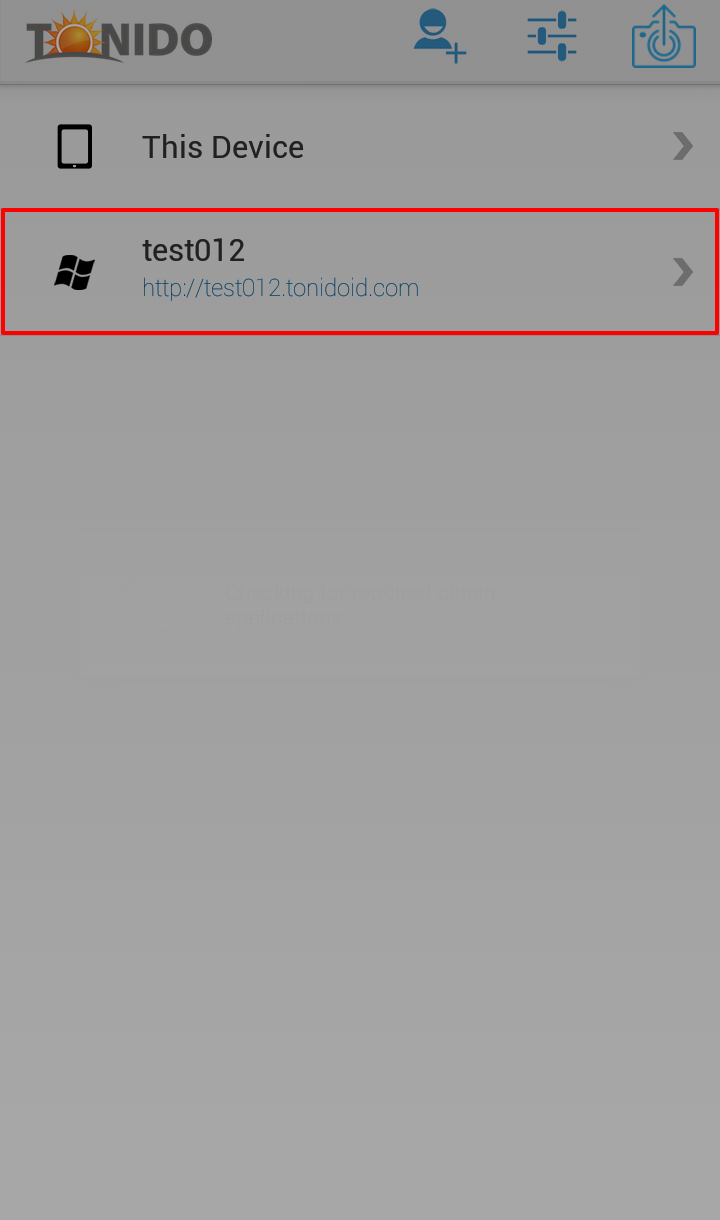
In the above screenshot, you can see that my personal cloud server has been added into the list of devices on my Android mobile.
Step #07 – Now, to access your cloud server, all you have to do is tap on the username of your server, and the app will automatically connect to your personal cloud server and take you over to your shared folders.
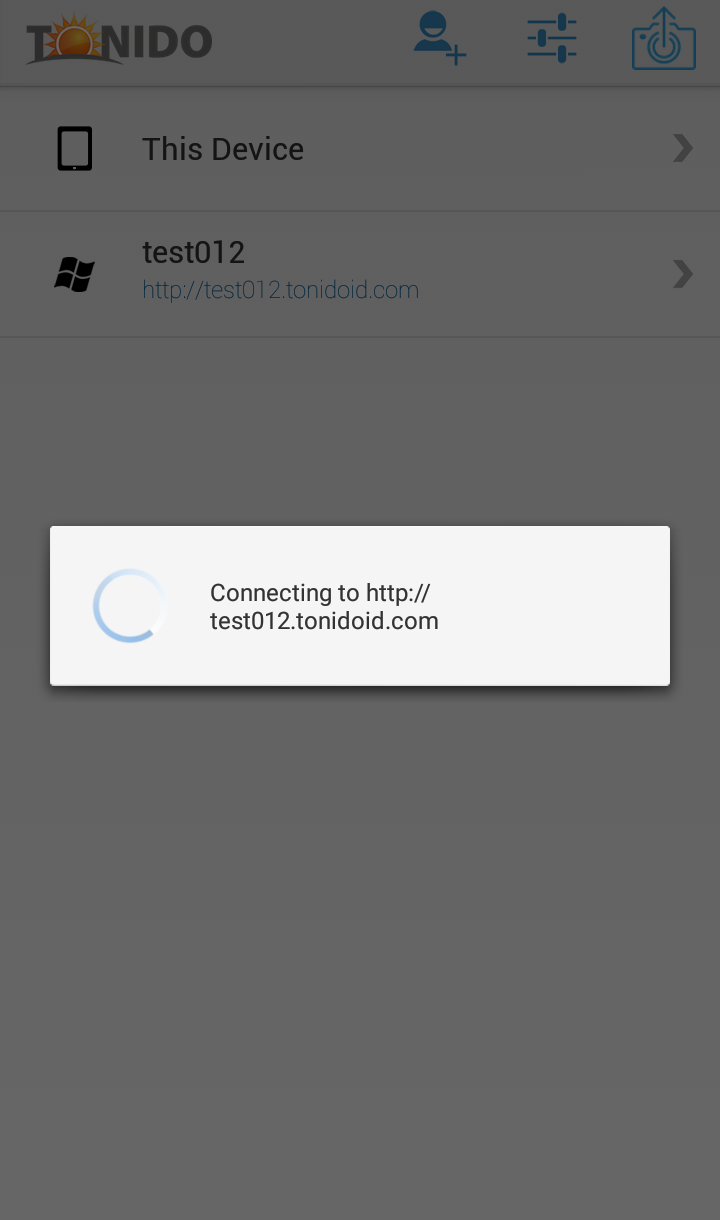
From here you can perform number of tasks. Some of them are:
- Access all of your media stored on your personal cloud server on PC;
- Download media to your Android device that is stored on your personal cloud server on PC;
- Upload media stored on your Android device to your personal cloud server on PC;
- Share media stored on your personal cloud server; and
- Stream media (including videos, music, photos) stored on your cloud server.
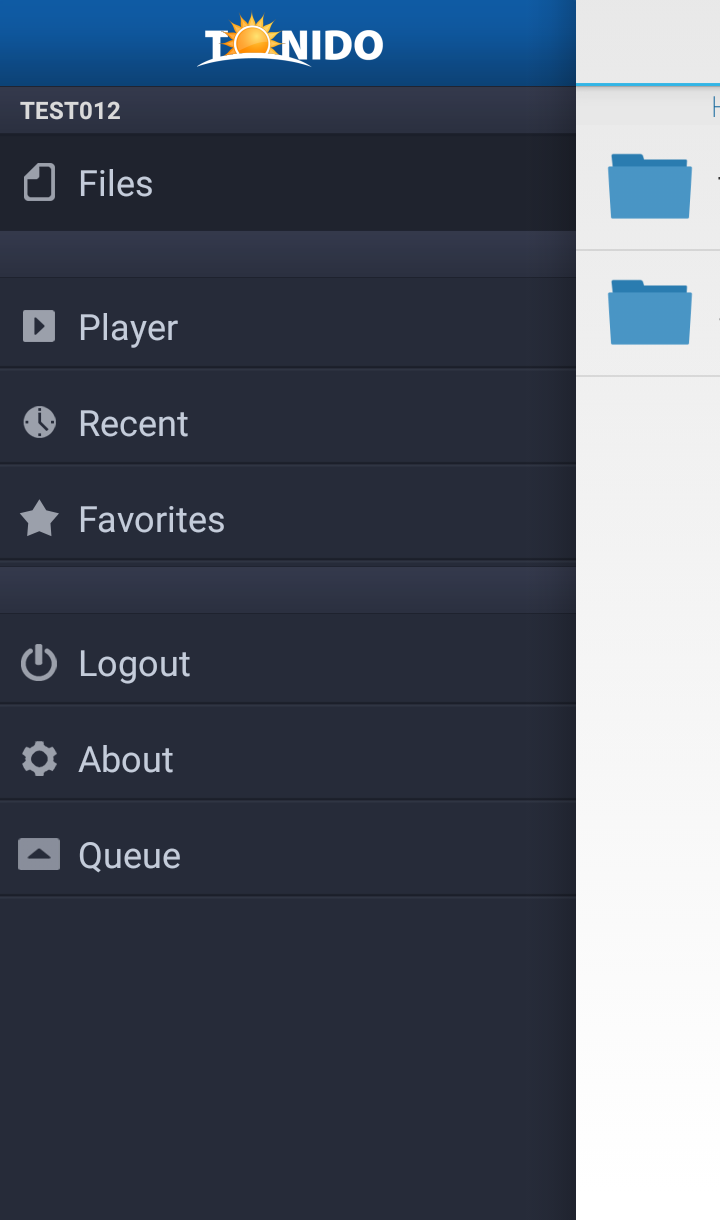
Now you have endless possibilities. You can now virtually access your whole personal cloud server (in short, your local PC) from any part of the world. ?
Step #08 – Apart from accessing your cloud server from Android device, there are few other options and settings that you might want to check or modify to further enhance your experience on the mobile device.
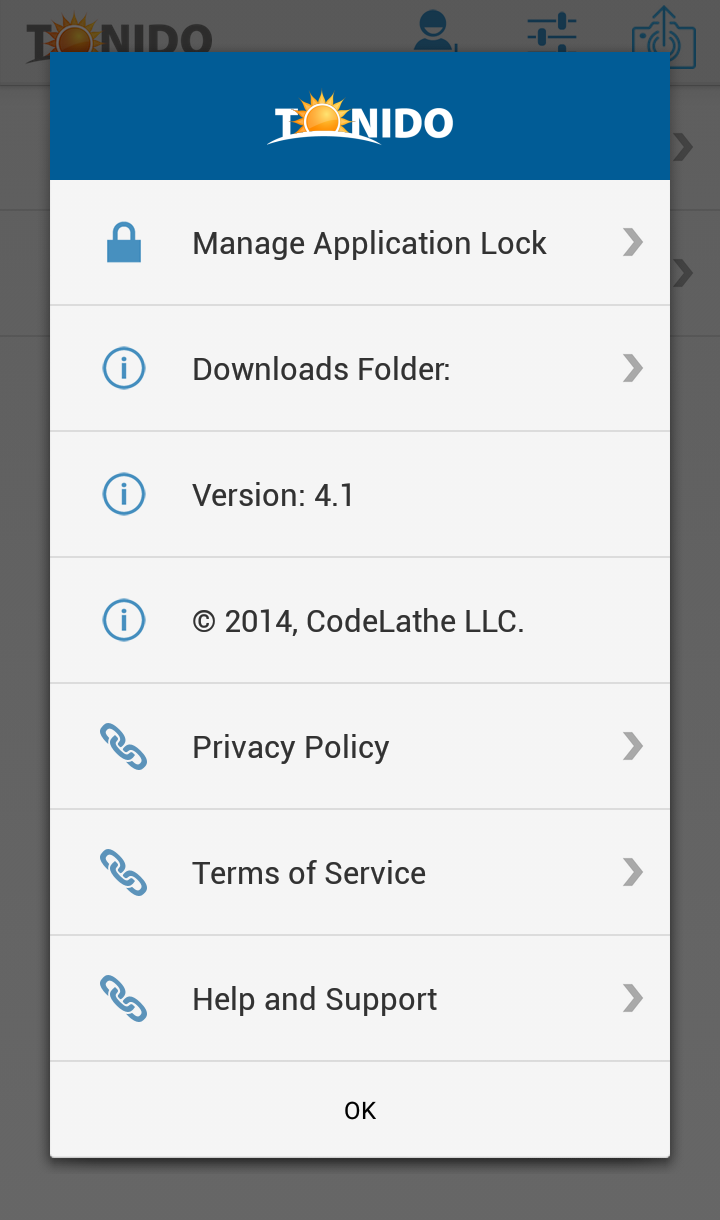
On the home screen of Tonido mobile app, there are three icons on the top. Those icons are for:
- Add Account – Allows you to add a number of personal cloud server accounts.
- Settings – Here you can modify your app settings like applying “Application Lock” to add another layer of security to the mobile app.
- Camera Uploads – You can setup and enable/disable Camera Uploads by accessing this option.
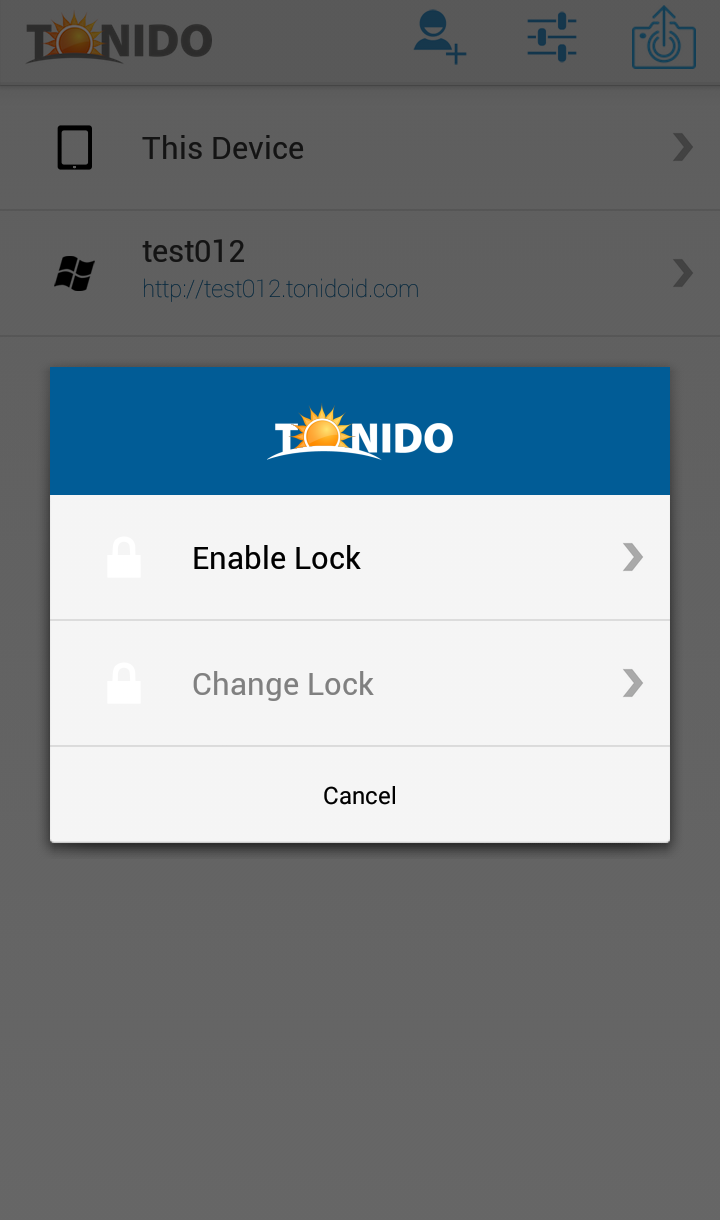
Step #09 – We have made you aware about all the basic functionalities being offered by the Tonido Android mobile app.
Now you are completely free to experiment on your own to unleash the real power of your personal cloud server and also check that how much secure your server really is.
Good luck! 🙂
Conclusion
To conclude this article, I would like to say that it should not take you a lot of time and efforts to make yourself familiar with the user interface and functionalities of Tonido personal cloud server after using other popular third party cloud services providers.
Moreover, it should not be hard for you to shift yourself from those unreliable third-party cloud services providers to your very own and personalized cloud server, which is located locally right at your home. And is completely under your control.
Believe it or not, we all know that developers behind Tonido have make our task to have our own cloud server a lot easier by providing us with this awesome software and mobile apps, which is not only free of cost but a lot snappier than many third party cloud service providers.
Did you try to setup your own personal cloud server? What do you think about this service? Please share your views and opinions in the comments section below.

